Thursday, November 15, 2012

Busy little carpenter bees...

We have so many amazing things to show you around here, and I NEED to get caught up soon. We have set a goal to finish up some major projects in time for the holidays - when everyone will mostly likely have more visitors. So, we have been working so hard that I haven't had too much time to write about what we have been finishing plus the house has been so chaotic that it was not picture ready :-)

We have almost finished painting the floors, walls and installing shelves in the basement. Hurricane Sandy gave us the motivation and push to finish this project after experiencing some flooding. We painted the hallway and even added a wall stencil that I just love! The office/studio is undergoing a beautiful transformation turning out to be my favorite room in the house! Two old pieces of furniture that were taking up a bunch of space in the garage have been refinished and found a perfect place within the house. Stay tuned...I will be posting pictures soon!

In the meantime head on over and read this article my wonderfully talented friend Amy from the blog Helen Ethel Studio wrote about my handcrafted jewelry for Handmade in Pa.

Ryann Thompson’s Photo Jewelry Keepsakes

Tuesday, October 2, 2012

Pumpkin Spiced Wafer Trifle

Pumpkin Spiced Wafer Trifle  

-Here is another recipe pulled from my other blog. This one is so amazingly good. Ian is looking over my shoulder as I rewrite this recipe repeatedly asking, "aaaand when are you going to make this for me?"

A few weeks ago I asked my facebook friends which autumn trifle they wanted to try more...pumpkin or apple. The votes were basically split down the middle, although the pumpkin fans were much more enthusiastic about their love of ANYTHING pumpkin. I knew I definitely had to figure this one out. Personally, I have never met a dessert I didn't like, but pumpkin pie is not on the top of my list. I do, however, love everything else pumpkin. So the trouble with coming up with this trifle was trying to steer clear of the all pumpkin puree layered trifles I was seeing in the recipes online. They seemed to be trying to duplicate a pumpkin pie in a trifle dish. Just eat a pumpkin pie then!


I finally figured it out, and it was very tasty! Just the right amount of pumpkin.

Ingredients:
  • Pumpkin bread- From scratch or a box. Either way will be fine. Make or buy 2 just to be safe. So what if  you have extra. Toasted pumpkin bread for breakfast...yes please! 
  • 1 box of white chocolate pudding mix
  • 1 can of pumpkin 
  • 1 box of spiced wafers
  • Whipped cream- Homemade or cool whip (I am sticking with homemade from now on).
That's it! Now see how easy it is to make...

Bottom layer:
Bake your pumpkin bread according to the directions. I am not sure exactly what recipe I followed. There are tons online, especially Pinterest. The next time I make this, I will update with the recipe I used for the bread.
Cube the bread.
Layer the base of your trifle dish with half of the loaf. Set the rest aside for now.

Middle Layer:
Make the white chocolate pudding (vanilla will work too if you cannot find white chocolate). Allow the pudding to set for a few minutes in the refrigerator. Once the pudding has set beat in 1 can of pumpkin. Mix well with a hand mixer for at least 5 minutes. Spread half of the pumpkin mixture over the pumpkin bread in the trifle dish. 

Third/decorative layer:
Put a little less than 2 sleeves of wafers in a large ziploc bag. Seal tightly. Using the back of a wooden spoon, mash up the wafers. I broke them up into dime sized pieces. Spread half of the bag over the pumpkin mixture for your 3rd layer. Then top with whipped cream and repeat all 4 layers finishing with the rest of the whipped cream.

Top the trifle with a sprinkling of wafer crumbs!

If your family is like mine, you always have pumpkin pie at Thanksgiving, but a lot of people don't actually eat the pie. Try this recipe out as an alternative and watch how fast it goes.


Thursday, September 20, 2012

Hall Wall

I was just writing a post about whitewashing the wall in the office and I realized I never told you guys about the wall I stained! This was one of the first projects I did in the house. I was obsessed with the idea of preserving one of the original wood paneled walls. The entire downstairs was the knotty pine paneling, and although Ian and I both appreciate things for their original beauty, we did not want to live in a dungeon. So we did paint most of it; however, we decided to keep the hallway wood. I wanted a rich deep tone but was NOT looking forward to sanding the entire wall. So I scoured the internet for an easier option and found that with a little patience and a steady hand I didn't have to sand the wall to achieve the look we wanted.


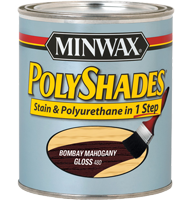
I read up on Minwax Polyshades and decided to give it a try.
**This technique is not for everyone or every surface!

The Polyshade can end up streaky if you are not careful and patient. Luckily the wall I was working on was knotty pine so it already had some grain and knots built in so it disguised any areas that may have ended up streaky.

Please read the directions provided by Miniwax on their website. They spell it out for you better than I could, and if you mess up you can blame them. Ha. 


Here are a few of the tips I would like to add -
  • Although the polyshade is thicker than stain, it will still run a bit so do not apply it heavily and work steady. I taped along the wall an laid a border of plastic and paper towels to absorb any drips (paint thinner did clean up any stain that got away from me). 
  • I used a VERY soft bristled brush made specifically for stain and varnish. This is necessary to minimize any streaks. The polyshades are thicker than stain, and since you can't rub it off like you normally would, you have to make sure you are applying it evenly and smooth. I did clean the wall and give it a light sand before I started, but that was it.
  • Only move along the grain! I worked one panel at a time. I dipped the brush and applied a stroke at the top, then dipped again and came up from the bottom. I repeated many strokes up and down pushing the stain along the panel.  The stain smoothed and softened with each stroke until it was evenly distributed along the panel. 
I love how the wall turned out! No matter which direction you are walking from in the house you can see this wall. It is truly a focal point and I am so glad we decided to preserve some of the character of the wood in the house. 


We still need to do something about the door you see in the picture. That will come when we update the bathroom behind the door. I am thinking maybe a sliding barn door? I can't figure out what will look nice with this wall. Ian and I have to brainstorm a bit.


Thursday, September 13, 2012

Candy Apple Trifle

Finally we have been experiencing "fall-like" temperatures this week and it has me in the mood for some fall treats. So I went back to my old blog to pull out some of my trifle recipes for all of you. I will be taking my recipes from that blog and posting them here on DIY with my GUY. They are too good to be lost in the blogosphere where forgotten blogs go to die.

I keep warning Ian that we NEED to start sticking to a workout routine because the fall is coming and I will be cooking!!


Candy Apple Trifle

Ingredients:
  • 6 Green Apples
  • 2 tbl or so of Brown sugar
  • 5 count of Bourbon (optional)
  • 2 Tablespoons of butter
  • Apple cake or Apple cider doughnuts
  • 2 pints of heavy whipping cream
  • 1 teaspoon vanilla extract
  • 1/2 cup powdered sugar
  • 1 Candy Apple


Base layer:
I really wanted to use fresh apple cider doughnuts, but due to time constraints, I was unable to go to the nearest orchard. Instead, I used an apple cake which turned out to be a delicious substitution. You can either make this from scratch, box or pick one up at the market.
Cut up whatever you decided on for the layer and divide in half. Layer the bottom of the trifle dish with half of the cake.


Second Layer:
This is where the apples come in. I really didn't know what I wanted to do to the apples. I just kept thinking about what goes into an apple pie. Do whatever you want. Just keep in mind the moisture from the apples when cooking. Do not add too much additional moisture.
 How I cooked the apples...
In a large skillet I sauteed about 6 green apples, sliced and peeled. I chose green because of their tartness. The cake and whipped cream layer were going to be sweet enough.

First add about 2 tablespoons  of butter to a large skillet and about 2 tablespoons of brown sugar (I really just added whatever amount I felt like. Remember...I wing it). I also added a little bourbon because I had some in the cupboard, but you don't have to. Cook down and add the apples stirring frequently until they look like they would if they were inside of an apple pie.
Cool slightly before you add to the trifle.

Third and Top Layer:
I went with homemade whipped cream this time. Depending on how much time I have I may cheat and use cool whip, but the consistency and flavor of homemade is so much better. 

It is pretty simple to do.
Easy Homemade Whipped Cream:

  • 2 pints of heavy whipping cream
  • 1 teaspoon vanilla extract
  • 1/2 cup powdered sugar (vary depending on how sweet you want it to be)
Whip the mixture with an electric hand mixer until raised peaks form in it and hold their shape. It should take about four minutes (or much longer if using a manual hand mixer or whisk).

Back to the trifle- Add the whipped cream layer and then repeat all 3 layers finishing with a top layer of whipped cream.


As a garnish I sliced a caramel candy apple and placed it around the top. You could make them yourself, but if your sole purpose is for this trifle then just pick one up at the orchard when you get your apples. 
 

I am really looking forward to making this trifle again for Ian. We'll be making a trip to the orchard here in the next few weeks (maybe next weekend). There is nothing like going to the orchard on a crisp fall day to gather pumpkins and apples! I'll pick up some freshly dipped caramel apples and try out the fresh apple cider doughnuts as the base layer for this trifle. If you make it there before I do, leave a

Thursday, September 6, 2012

Birds of a feather...

During the first week Ian and I began dating we wrote a lot of emails.We worked opposite schedules and did not live right down the road from one another so emailing was really our only option as we eagerly awaited the weekend and our 2nd date

After we had been dating awhile I made sure to print out the emails so I could always remember how we started, but I didn't want to just toss them into a box only to be stumbled upon during random cleaning sprees.


I went through several different ideas trying to figure out something that would fit into our decor and not stick out like a shrine to our relationship. When others pass by they wouldn't even know what it was other than just some artwork on the wall -unless they read this post of course.

I came up with sort of a newsprint backdrop with two birds on a branch. The print is small, so small that you would have to really stop and look to read everything - I did this on purpose. I fiddled with the margins and font size in Microsoft Publisher for awhile until I was able to fit everything within the dimensions of the frame.
I also separated each email with the date and "he said or "she said' in bold print to show the progression and length of our emails during that week. We immediately felt so comfortable sharing so many details about ourselves and our lives with one another. Ian told me all about the job that he loved, his goals and how hard he worked to get where he was. I went on about my huge family and how important they all are to me -my mother is the oldest of eight...

After I printed everything out I mod podged the emails to the cardboard backing that came with the mat. Allowed it to dry overnight. I mixed some brown acrylic paint with acrylic medium to thin it out and make a glaze. I then lightly brushed the glaze over the print to give it a slightly aged look.
I hand-painted the birds over the background. Again, it is not the specifics of the emails that I wanted to concentrate on. The actual emails are behind the frame so I can pull them out whenever I want to read through them.
It is more about the significance and impact these early words were going to have on our lives. I see this picture everyday and remember how we began. The excitement I felt when I saw his name in my inbox. I remember telling one of my girlfriends as I received an alert on my phone, "this one is different", and he surely is. It is also helpful to pass by this picture when he is being especially different and I need the pleasant reminder :-)

Wednesday, August 29, 2012

Keeping things neutral

Dining room - Before and After

We still have several items to add like a rug underneath the table, but so far I think it looks amazing compared to the dark paneling we started with. It may look a little too beige right now, but there are several reasons for this.  

1. I like a neutral backdrop with pops of color that I can change often. Ian and I both like to change things around periodically so I try to create a decor that allows me to do this. If I keep the base of the room somewhat neutral I can add pops of color with inexpensive additions like new place mats, center pieces, holiday decor...etc. 
We are not limiting ourselves during the holidays. This room will look just as fantastic with pumpkins and Christmas garland as it will with spring flowers from the garden on the table. I can create a new feeling in the room as often as I like. 

2. I bought these curtains less than a year ago for my old place (before I knew I was moving), and I spent too much money not to use them...I am determined! I also have a pair of chocolate brown curtains that I plan to add when it becomes colder out. As I said before, I am a big proponent of switching a few of your decor items around for the seasons, not just holiday decor. I like to create a cozier setting in the winter with richer, darker colors, and then brighten things up in the spring. It prolongs the life of your items, and prevents you from becoming bored with everything. You don't need to go out and buy new stuff after a year or two.

3. I want to do something dramatic on one of the walls. The stairs to the second floor are in the dining room. I want it to POP!- whenever I finally decide and commit to a plan. Notice the paint swatches on the wall...I have several ideas. Stay tuned...


Tuesday, August 28, 2012

Our Dumpster Dining Table

What a difference a table makes!

A few months ago (before I moved in) I excitedly called Ian to ask him if he could drive over to the alley near my apartment to pick up a table I had just found out by the dumpster. It took a little convincing...luckily Ian trusts my instincts when it comes to furniture, or at least he fakes it and humors me well.
The next day he called me from outside of the dumpster asking if I really wanted the table...he was not nearly as excited about the find. After explaining to him that that horrible odor he was smelling was from the dumpster he was next to and NOT the table, he lifted it into his Jeep and brought it home.

He also grabbed the legs that were scattered around even though I had told him I did not intend to use them. Thankfully Ian didn't listen to me.

My original plan was to purchase new legs and stain them to match the new finish I was going to give the top. Although this would not have been an overly expensive process, the point of pulling a table from a dumpster is transforming it for as little $$ as possible. This is the challenge, the goal and part of the fun. I love visualizing what something can be... discovering a diamond in the rough when no one else could see it.

So after pricing everything, we decided to stick with the old legs and give them a fresh coat of paint. Ian built a new base to support the table while I SCRUBBED, sanded and stained the top a nice dark walnut stain.


Shortly after we began working on the table my Stepmom mentioned she had chairs in her basement that we could have. After my Grandpop past away, my parent's bought his house and did a beautiful job renovating the home. So these were my Grandfather's chairs and I am so pleased we were able to bring them out of the basement and give them a new life.


I am working on a separate post about how I painted the chairs and legs. This was my first experience finally trying out the chalk paint I keep hearing so much about. I am hooked!
For now, back to our table...


We love it! Our dining room is in the center of the house so every time I walk anywhere I was going through an empty and unused room. As soon as the table was in I felt a huge shift from a house that is under construction to finally feeling like a home. I feel like the table was the anchor the house needed. Everything is falling into place now. I could finally hang pictures and decorate! I can invite friends and family over for dinner! Just in time for Fall...
Oh what a difference our dumpster table has made! The best part, we made it together!


Friday, August 10, 2012

Things happen in a dining room. Important things.

I wrote this almost two months ago. Before I had officially moved into the house and before I started this blog. It's a thought that keeps me motivated on days when I am too tired to get any work done.

Today, I woke up in the house by myself for the first time. It was Monday morning and Ian had to go to work early. We spent this past weekend moving the furniture that had been residing in the garage since April into the house. We could finally sleep in the bedroom. Squatting in the living room was getting old. 

The house is looking less like a construction zone. The kitchen cabinets are starting to fill up, things are finding their places, missing items are beginning to surface...the house is starting to feel like a home.

On this early Monday morning I poured myself a cup of coffee and wandered around the silent and lonely house. Unsure of what to do with my solo morning, I found myself sitting on the dusty and unfinished stairs looking down on the dining room. It's empty now except for some tools and buckets of paint.

I am not exactly sure why I decided to sit on the stairs. Probably because we don't have a couch yet and the bedroom feels lonely. For whatever reason...I sat and started imagining what the dining room was going to look like. I see a rustic farm table with a dark stained top. After I refinish Ian's Grandmother's secretary desk, I'll put that in the corner with some plate-ware. My collection of vintage bottles will go in the bay window. Hmm...what color for the walls??

While I was trying to picture different wall colors and decor I started looking past the unfinished walls that have been nagging me for weeks - we primed them, we just haven't picked a color.  Today I started imagining what this room is for...Our family and friends will gather here. I will finally be able to serve a holiday dinner to my family in this room. We will drink wine and laugh together recounting old memories and making new. Things happen in a dining room. Important things. Days will be celebrated, good news will be shared, conversations will be had and decisions will be made. After a long, tedious and tiring weekend it is nice to sit and remember what all of this is for.

On this morning that started out feeling so lonely, I am suddenly feeling overwhelmed by all of the love that surrounds me in this unfinished dining room. Life will happen here. My life with Ian.

I think I will pick a paint color today...


Monday, July 30, 2012

Summer Splendor

We recently took a little break from the house and all of the projects to enjoy some summer activities...finally. We have been so busy moving and renovating that we haven't really taken part in any of the typical warm weather fun. Until this past weekend. My Stepmother asked if we wanted to spend a day on their new pontoon boat. Although Ian and I had a Sunday filled with tasks around the house planned, we jumped on the idea. I felt a little guilty thinking we really shouldn't be wasting a day. That all went away as soon as we hit the water. We desperately needed a day to relax and enjoy ourselves. Of course we talked about the house and our current or upcoming projects...but we did so while floating on rafts with a drink in our hand.

Definitely NOT a day wasted. Ian and I felt so relaxed. Admittedly something we had not felt in some time. We spend most of our days working somewhat stressful jobs, then coming home to work a few hours on the house. Most weekends are spent making several trips to Home Depot and Lowes, painting furniture, mowing the grass...etc.

Something to always remember...
Although we enjoy doing things ourselves and getting our hands dirty, we realize that taking a break is as much of a necessity as finishing the bathroom. Not only taking a break, but taking the time to do something fun! Ian and I immediately felt the difference within ourselves and how we were relating to one another after a day spent in the water with family. Reminding ourselves that the house will always be here, what comes first is us. None of this matters if we don't take care of ourselves.  
We're building a life together...not just a house.

On Wednesday we are leaving for our long awaited summer vacation. Then we'll get back to work :-)

Tuesday, July 24, 2012

Make your own tomato sauce - It's easy!

Hello fellow DIYers! let's pop into the kitchen for a bit.

I decided to take a break from the renovations to share one of my money saving tips...make your own tomato sauce! Not only does it taste so good and fresh, but  making a huge batch of sauce to portion and store in your freezer will save you time and money!

I have been doing this for a few years now, and I kept telling Ian that I wanted to stock the fridge shortly after I moved in. So this past Sunday I finally took the time after painting our dumpster table (post coming soon) to make the sauce.

Don't be intimidated. Or feel that you can't make sauce if your Grandmother isn't a feisty little Italian woman from Sicily. It is really easy.

 I am not an expert and I am sure there are tons of other recipes out there. I was given this recipe a few years back and it seems to work just fine for us. My point to the post is that you should make your own sauce to save money and have the convenience of reaching into your freezer whenever you need sauce. Feel free to explore other recipes, this is just what I do...

Ingredients

  • 4 tbs of minced garlic
  • 1 cup of olive oil
  • A bunch of basil and oregano - I usually make a big batch of sauce during the summer when I have fresh herbs planted. It tastes better and is again, cheaper. You can plant herbs for about $2-$3 and have them on hand whenever you need. If you don't have any fresh herbs the dried will work.
  • 2 small cans of tomato paste
  • 2 large cans of tomato sauce
  • 1 can of diced tomatoes - I buy the cheapest can of the above ingredients I can find. Each can is less than $1!
  • BBQ - Just a little. It depends on how sweet of a sauce you like. You'll know.

Saute all of your dry ingredients with the oil in a pan on low until is breaks down a bit. 
In a large pot, throw together all of your canned ingredients (do not add the BBQ yet).
  • Boil for 2 hours.
  • Add the BBQ 
  • Simmer for 45 mins.  
Turn off the heat and allow your sauce to cool. Then divide it up into containers and freeze. I break mine up  into serving portions for spaghetti dinners and a few larger containers for lasagna and ziti nights. 

Enjoy your savings and impressing everyone with the sauce you made from scratch!


Friday, July 20, 2012

No Sew Pillowcase Bag

When Ian and I had first merged our linens I ended up with a large pile of stray pillowcases. Ian was just going to toss them, but then I remembered coming across a pin on Pinterest a few months back. Someone had turned an old pillowcase into a bag. Kudos to the originator of this idea because it really is genius and so simple.

The tutorial I first found included cutting and sewing the pillowcase. I hate sewing and will find any way I can to avoid it. It's not that I hate sewing actually, I am just really terrible at it and do not really have the patience.  

So...why not just cut the pillowcase and tie it? They will make handy and responsible shopping bags. I just throw them in my purse so I always have one on hand at the store.

No Sew Pillowcase Bag


1. Fold the pillowcase in half.

2. Decide how deep you want the bag to be or how wide an arm hole you would like. Then cut.

3. Tie the two ends together and pull tight in both directions to make sure that the knot is secure. 

That's it! 

I have tested them several times with my groceries and so far, so good! Now I always have a bag on-hand!


Thursday, July 19, 2012

Our Wicker Redo

I've showed you the before pictures of the house, now it is time to get to the good stuff...all of the projects we have been working on. Some projects have taken a day to complete, some a week, a month and some are still going and will be for a long time. Let's just say we have a lot of eggs in our basket!

The first project that I began tackling was the search for outdoor furniture. Most of you would probably focus on completing more practical projects like maybe the unfinished bathroom...well we're getting to that part. We needed somewhere to relax and enjoy the wonderful yard while working on the inside. Sitting outside reminds me of some of my favorite conversations with my father and stepmother. Anytime I visit them from around April to late September or October you will find them on the porch. It's a great place to visit and chat with one another.

So when Ian's Mom so generously offered us their old set of wicker patio furniture, we jumped on it! Although the set was a little faded, everything was still in pretty good condition. She gave us enough to furnish the deck and the covered patio...2 settees, 2 tables and 6 chairs (2 rocking). Clearly we were very lucky and appreciated their hand-me-downs because we all know what this would have cost us had we purchased new patio and deck furniture. 

With a little paint and new cushions, they looked good as new!


I am currently still searching for cushions for the set we placed on the deck. The cushions pictured above were found very inexpensively at the Christmas Tree Shop.
We love sitting out on the covered patio, especially during a thunderstorm. I cannot wait until next year when we can actually fill the porch with hanging baskets and flower pots (we're skipping all of that this year).


Thursday, June 28, 2012

The Beginning...

My previously skeptical self always balked at the notion- When it’s right you will just know.
Well, I wouldn't say I “knew” right away when I met Ian, but it did not take very long at all.
On our very first date, we sat and talked for7 hours straight (our apologies to our server). That was definitely my first clue that this was different.
 
When he asked if I wanted to go to the Home Show on our 2nd date, I thought he was too good to be true.

By our 3rd date I became certain that we were embarking on something new and that I was sitting next to a very special man. One that was not going to go anywhere, anytime soon.

Now down to business and the reason I am exposing my new found cheesy core to the world. A week after Ian and I began dating, he closed on a house. A wonderfully old and beautiful house with tons of potential.

Which brings me to our 4th date - a week in. Ian invited me to meet me at his new house right after he had closed on it and picked up the keys.  
    
I loved the house right away. It needed a lot of work, but had so much character and potential. Listening to Ian describe everything he had planned for the house was very attractive to me. He knew what he was talking about, and he was not afraid of all the work he had ahead of him. He was able to see the potential this 60 year old cape cod style house had...and I was able to see the potential he and I had...

By our 5th date, Ian and I were in work boots and safety glasses blissfully gutting the upstairs together...

Fast forward...
Today, Ian has passed his final inspection!! Tomorrow we are moving his furniture into the bedroom. The upstairs is finished. Almost. The bathroom has been gutted and redone. The living room and dining room have been painted and the lawn has been mowed...several times.

And in less than a month I will be moving in...and I have never been happier.