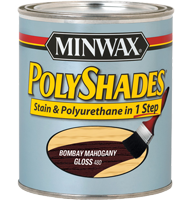
 I was just writing a post about whitewashing the wall in the office and I realized I never told you guys about the wall I stained! This was one of the first projects I did in the house. I was obsessed with the idea of preserving one of the original wood paneled walls. The entire downstairs was the knotty pine paneling, and although Ian and I both appreciate things for their original beauty, we did not want to live in a dungeon. So we did paint most of it; however, we decided to keep the hallway wood. I wanted a rich deep tone but was NOT looking forward to sanding the entire wall. So I scoured the internet for an easier option and found that with a little patience and a steady hand I didn't have to sand the wall to achieve the look we wanted.
I read up on Minwax Polyshades and decided to give it a try.
**This technique is not for everyone or every surface!
 The Polyshade can end up streaky if you are not careful and patient. Luckily the wall I was working on was knotty pine so it already had some grain and knots built in so it disguised any areas that may have ended up streaky.
Please read the directions provided by Miniwax on their website. They spell it out for you better than I could, and if you mess up you can blame them. Ha.
Here are a few of the tips I would like to add -
- Although the polyshade is thicker than stain, it will still run a bit so do not apply it heavily and work steady. I taped along the wall an laid a border of plastic and paper towels to absorb any drips (paint thinner did clean up any stain that got away from me).
- I used a VERY soft bristled brush made specifically for stain and varnish. This is necessary to minimize any streaks. The polyshades are thicker than stain, and since you can't rub it off like you normally would, you have to make sure you are applying it evenly and smooth. I did clean the wall and give it a light sand before I started, but that was it.
- Only move along the grain! I worked one panel at a time. I dipped the brush and applied a stroke at the top, then dipped again and came up from the bottom. I repeated many strokes up and down pushing the stain along the panel. The stain smoothed and softened with each stroke until it was evenly distributed along the panel.


We loved looking at all of your great DIY projects and yummy recipes! We invite you to link up to our Strut Your Stuff Saturday. We are hosting a Build Your Blog Conference in Salt Lake City on Feb. 16, 2013. You can get more info on our blog or go to buildyourblogconference.com. We hope to hear from you soon! -The Six Sisters
ReplyDeleteThank you so much! I will absolutely link up! Heading over now to check it all out.
ReplyDeleteThanks again!
Ryann
Love this! Do you know if this works on the "fake" wood paneling?
ReplyDeleteHi, I just came across your blog when I did a google search for "polyshades" It's really funny that you have these panels in your house, because I have the SAME EXACT panels in my basement that I'm also refinishing with Polyshades (and the same finish too... Bombay Mahogany Gloss!) This idea came upon me when the panels have those long grooves that would take way too long to sand down to bare wood.
ReplyDeleteHi, we are wanting to do the same thing in our house. How is the stain doing after 2 years?
ReplyDeleteWe have the same pine walls, SOme of them have multiple coats of poly on them. I assume you have to remove or at least sand the walls that do, right?
ReplyDeleteHave 40 yr old oak wood paneling in dinning room, gonna paint it. Gonna csll in a pro, can't wait so excited, can only be improvment . Bright n cheerful.
ReplyDeleteDid you have to sand it down to bare wood or just send it out to give it a profile
ReplyDeleteMy mothers house still has the original knotty pine kitchen cabinets and they are 8n excellent shape. My granddaughter is on the house now and wants to redo the kitchen. I keep telling her to keep the cabinets. I think they would look good sanded and natural with just a varnish on them.
ReplyDelete